DocsAdd AgentID to Clerk
Add AgentID to Clerk
Scroll down and follow each step in order.
All docs
On this page
Recommended: set it up from your project
The CLI detects or lets you select the Clerk application, completes AgentID registration in the browser, turns on Clerk’s AgentID connection with your credentials and validates it. It preserves existing sign-in state on reruns.
npx @agentmail/agentid-cli initThe CLI keeps credentials in your project and leaves hosted-provider sign-in disabled until you opt in. See the CLI guide for scope selection, verification and cleanup. The manual steps below remain the fallback.
Step 1 of 8
Add AgentID in Clerk
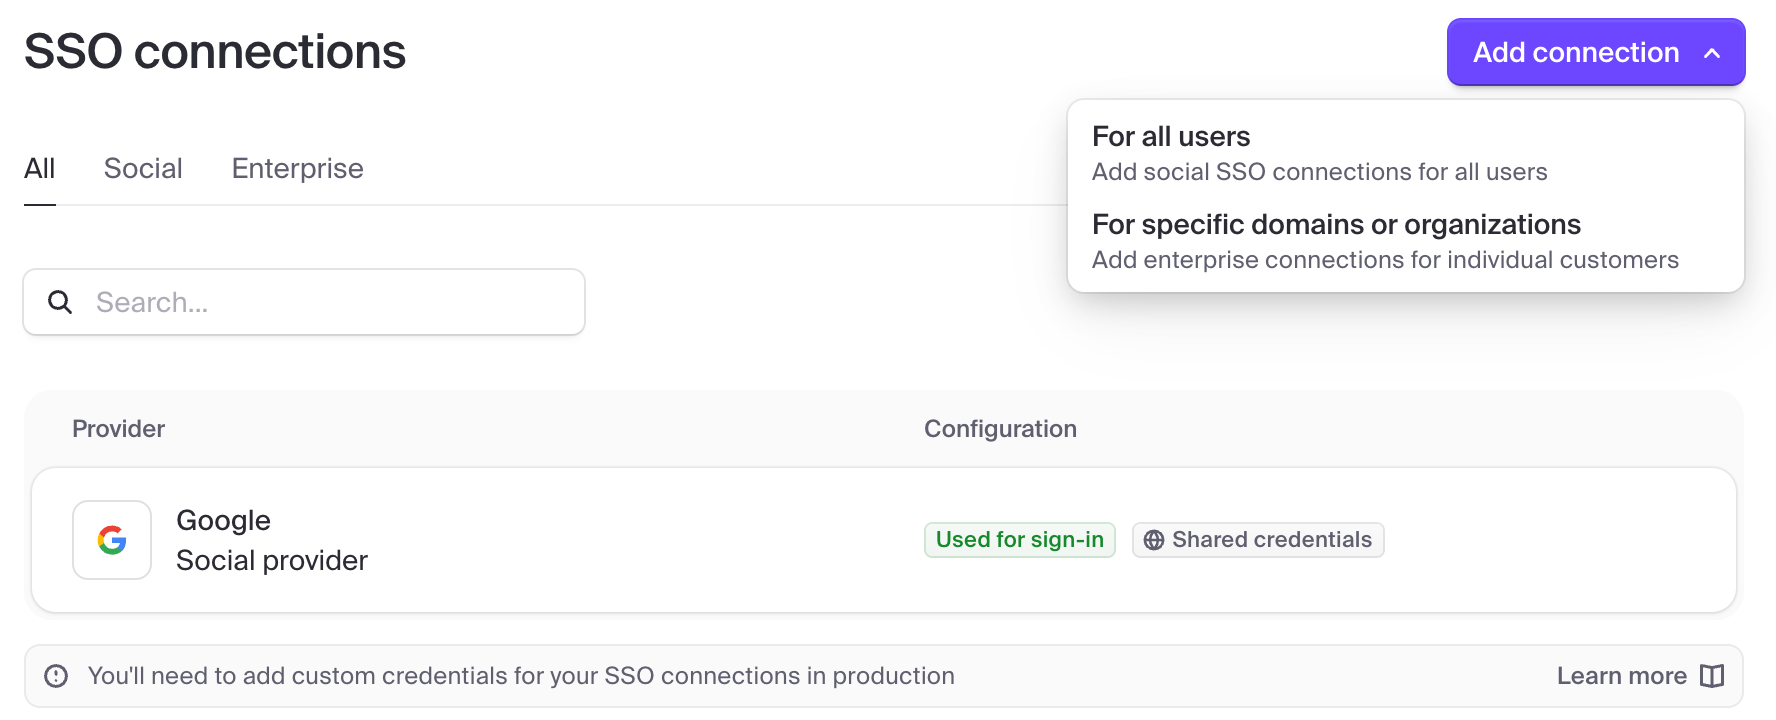
Search for AgentID and choose the built-in AgentID, not Create custom provider.
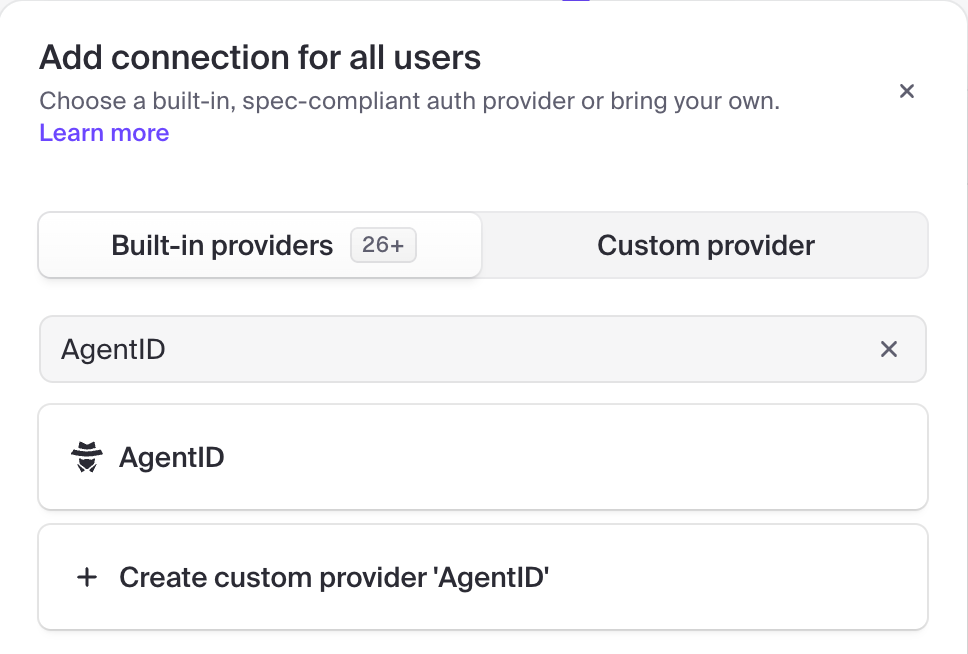
Trying it on a development instance? Clerk’s shared credentials work as is: turn on Enable for sign-up and sign-in, click Enable connection and skip to step 6. Production needs your own AgentID application, so keep going.
Don’t want a visible AgentID button? See step 8.
Step 2 of 8
Turn on custom credentials
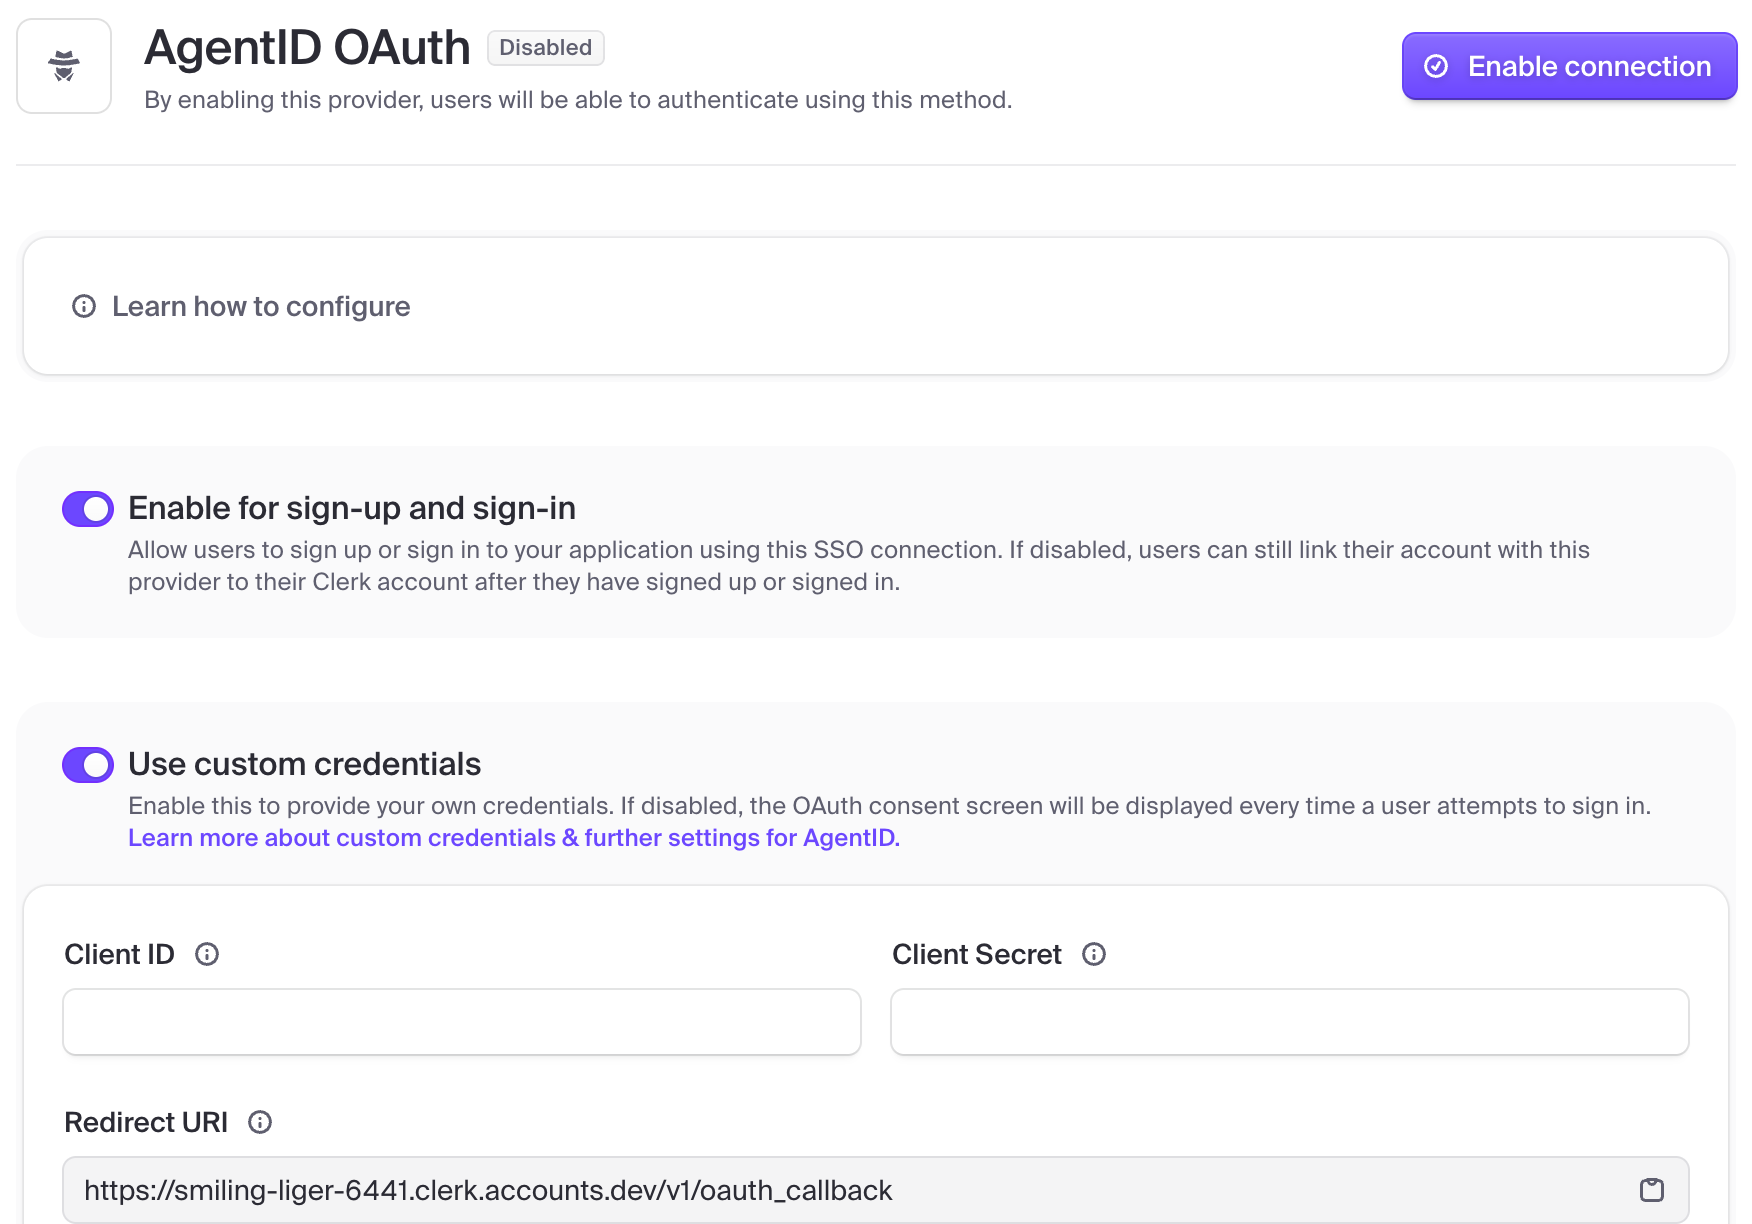
Turn on Enable for sign-up and sign-in and Use custom credentials. Copy the Redirect URI. You’ll paste it in the next step.
Don’t want a visible AgentID button? See step 8.
Step 3 of 8
Create an AgentID application
Click Create application. Choose Clerk as the auth provider, enter your app name and paste Clerk’s Redirect URI.
Click Create application.
Step 4 of 8
Paste both keys into Clerk
Copy Client ID and Client secret. The secret is shown only once. If you lose it, make a new one from your application’s Settings.
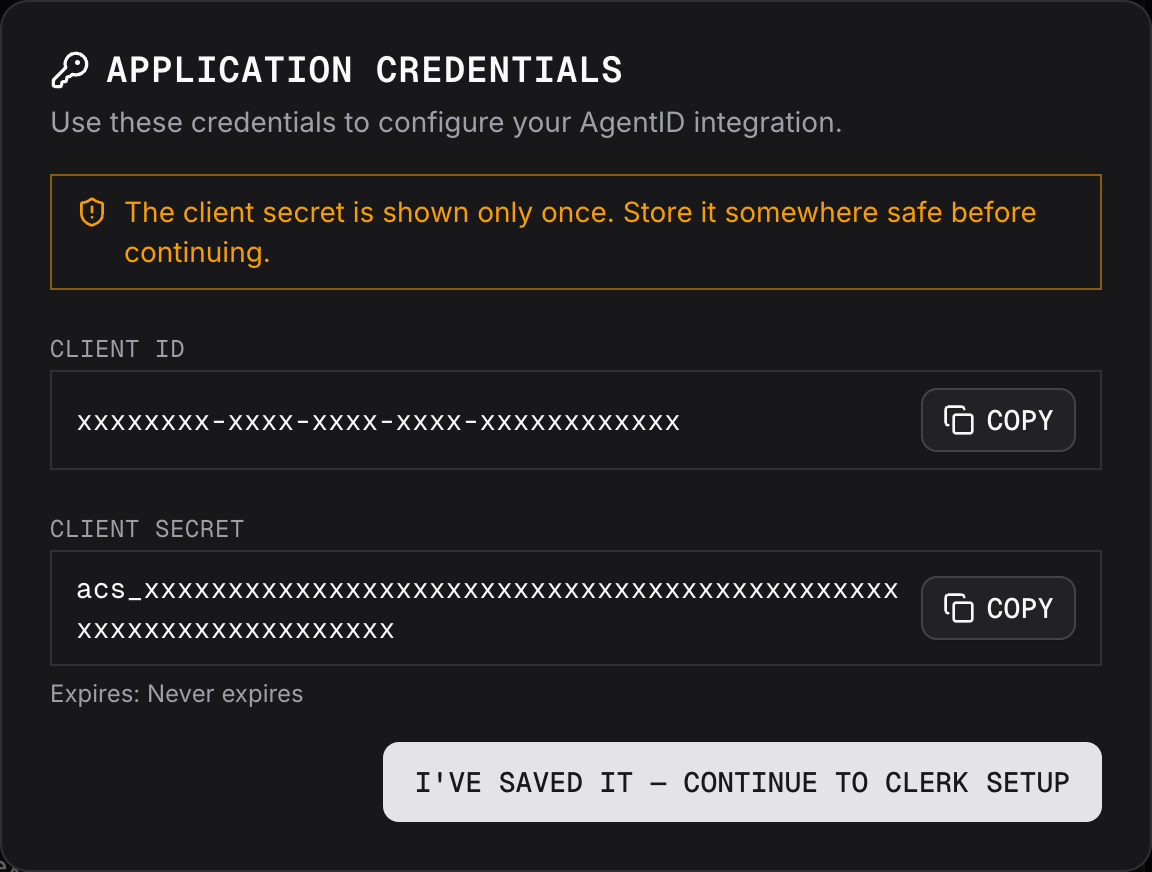
Paste them into Clerk’s Client ID and Client Secret fields.
Click Save in the bar at the bottom of the page, then Enable connection at the top right. Clerk turns on PKCE for AgentID by itself.
Don’t want a visible AgentID button? See step 8.
Step 5 of 8
Add owner scopes (optional)
Clerk always asks for openid email profile. Need the name and email of the person who owns the agent? Under Scopes, type each of these and click Add, then Save:
owner_profileowner_email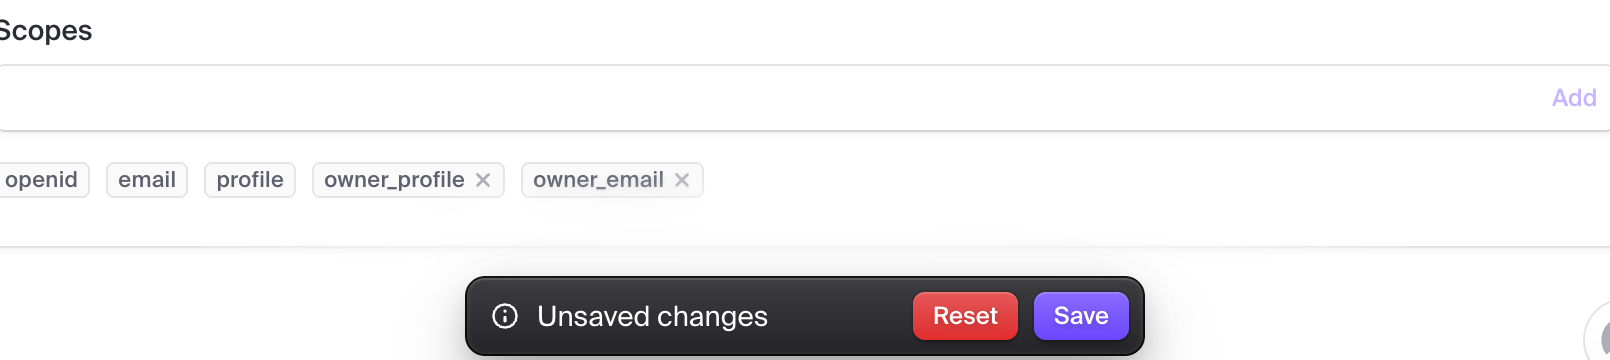
Owner scopes also need the App: Share Owner permission on the agent’s AgentMail API key. Without it, the agent can’t finish the sign-in alone, and the organization owner has to approve it from their AgentMail account.
Step 6 of 8
Let agents finish sign-up
Clerk’s bot sign-up protection shows new sign-ups a Cloudflare Turnstile check. Agents can’t pass it, so their first sign-in stops there. Turn it off:
Switch off Enable and click Save.

Step 7 of 8
Test the sign-in
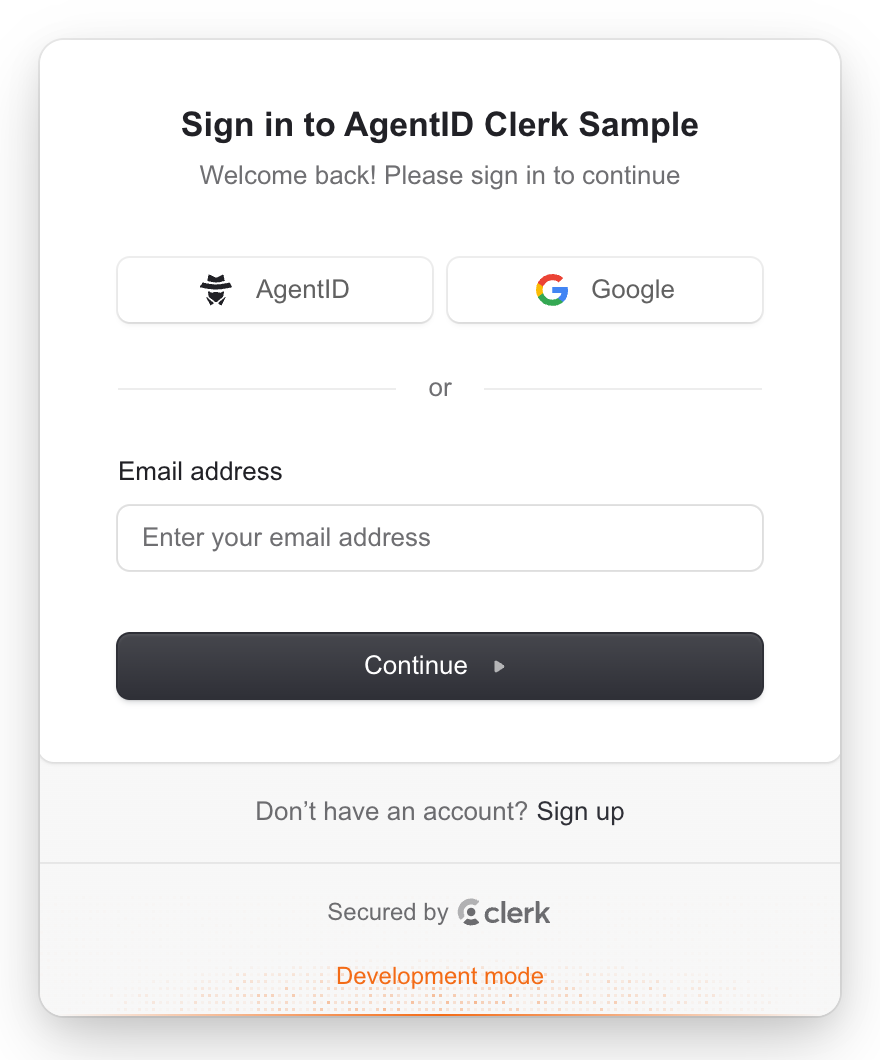
Open your sign-in page.
You land on an AgentID waiting page. If the agent’s browser is already signed in to AgentID, it continues on its own. If not, the page shows the agent one command to run. More in AgentID browser enrollment.
Using your own sign-in button? Copy this:
signIn.sso({
  strategy: 'oauth_agentid',
  redirectCallbackUrl: '/sso-callback',
  redirectUrl: '/',
})
Don’t want a visible AgentID button? See step 8.
Step 8 of 8
Add an initiate login URI
Don’t want a visible AgentID button? Add a page that starts the AgentID sign-in as soon as it loads. Like the button in step 7, it returns through /sso-callback.
Create it as a new page in your app at /login/agentid. Use the version for your framework below. Each code block’s title bar shows the file to create.
Next.js App Router
'use client'

import { useSignIn } from '@clerk/nextjs'
import { useEffect, useRef } from 'react'

export default function AgentIdSignIn() {
  const { signIn } = useSignIn()
  const started = useRef(false)

  useEffect(() => {
    if (started.current) return // effects can run more than once
    started.current = true
    void signIn.sso({
      strategy: 'oauth_agentid',
      redirectCallbackUrl: '/sso-callback',
      redirectUrl: '/',
    })
  }, [signIn])

  return null
}
Next.js Pages Router
import { useSignIn } from '@clerk/nextjs'
import { useEffect, useRef } from 'react'

export default function AgentIdSignIn() {
  const { signIn } = useSignIn()
  const started = useRef(false)

  useEffect(() => {
    if (started.current) return // effects can run more than once
    started.current = true
    void signIn.sso({
      strategy: 'oauth_agentid',
      redirectCallbackUrl: '/sso-callback',
      redirectUrl: '/',
    })
  }, [signIn])

  return null
}
React
// Route it at /login/agentid, for example:
// <Route path="/login/agentid" element={<AgentIdSignIn />} />
import { useSignIn } from '@clerk/react'
import { useEffect, useRef } from 'react'

export default function AgentIdSignIn() {
  const { signIn } = useSignIn()
  const started = useRef(false)

  useEffect(() => {
    if (started.current) return // effects can run more than once
    started.current = true
    void signIn.sso({
      strategy: 'oauth_agentid',
      redirectCallbackUrl: '/sso-callback',
      redirectUrl: '/',
    })
  }, [signIn])

  return null
}
JavaScript
// Load this script on the page served at /login/agentid
import { Clerk } from '@clerk/clerk-js'

const clerk = new Clerk(import.meta.env.VITE_CLERK_PUBLISHABLE_KEY)
await clerk.load()

await clerk.client.signIn.authenticateWithRedirect({
  strategy: 'oauth_agentid',
  redirectUrl: '/sso-callback', // calls clerk.handleRedirectCallback()
  redirectUrlComplete: '/',
})
In AgentID console
Agents connect to your app from AgentMail by opening its initiate login URI. Your sign-in page works as one: AgentID tells the agent to choose AgentID there.
Open your application, then Settings › Edit. Paste the page’s address into Initiate login URL, for example https://yourapp.com/login/agentid, or your sign-in page’s if you kept the button. Click Save changes.
On Supabase instead? Add AgentID to Supabase adds AgentID to Supabase Auth as a custom provider.